

Winter Sewing Chronicles: Mastering the Zigzag Stitch

One of my goals this winter was to learn how to use a sewing machine.
It's a skill that, throughout my 30-plus years, I've had yet to conquer.
Up until four weeks ago, the extent of my sewing ability involved a single needle, a thread, and a half-assed attempt to fix a small rip in a sock or pair of jeans or, more recently, a tear in the mesh door of my Nemo Equipment camping tent that my dog decided to enlarge by sticking his head through.
But now, ladies and gentlemen, I know what a zigzag stitch is and how to use it.
Throughout the past month, typically on Fridays, Saturdays, or the occasional Monday, I stood in front of the fabric section at Odds & Endz in search of fleece scraps and appealing cotton patterns. After compiling a small collection of worthy fabrics, I stopped by Grandma's apartment to pick up her Viking Husqvarna Classica 100 sewing machine and the necessary materials.
Then, on a cold and dark winter night, I put two scrapes of fabric together, learned how to thread a bobbin, run the machine, and attempted to maintain my foot pedal speed. Before I knew it, I was sewing.
I began my sewing machine journey by creating something of purpose: pot holders. Thankfully, my first pot holder creations were well-received by family members at Christmas. I like to imagine my crafty and colorful pot holders protecting my loved ones' fingers and hands as they pull a tater-tot hotdish from the oven.
Then, after successfully learning how to sew a 10 x 8-inch square, I ventured on to learn how to sew a rectangle. To much delight, I learned, it's not all that different.
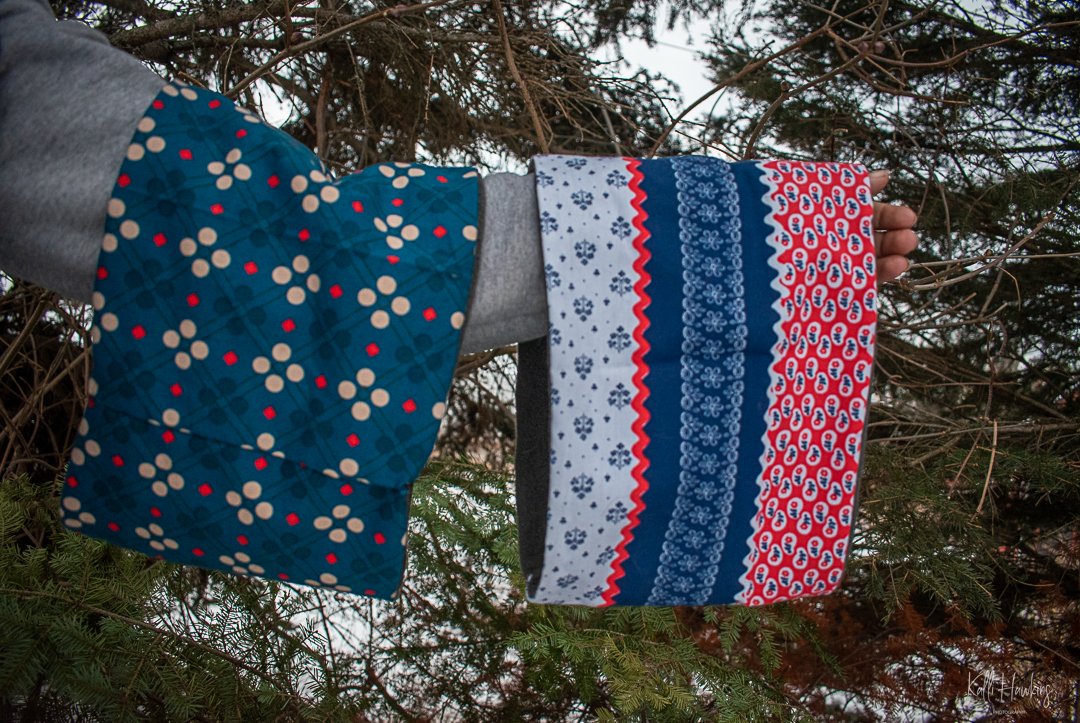
For my next sewing project, I wanted to up the ante and give myself a challenge. I wanted to sew a neck warmer with fleece material on one side and an appealing cotton or polyester material on the outside. I also wanted to use a zigzag stitch, recommended for neck warmers to allow stretch without ripping the seams. After some methodical research on YouTube University, I found the information and instructions I needed to get started.
I then measured a 25 x 8-inch rectangular piece of fleece and cotton material, switched the sewing machine's settings, and followed the necessary instructions. I'll just say, thank goodness the seams are not visible on the neck warmer.
After completing my first neck warmer, I quickly set out to measure and cut more fabric for attempt #2. I tried to maintain a balanced foot pedal speed and keep the fabric straight this time.
The next day, after completing my first two neckwarmers (a significant accomplishment, in my opinion), I proudly brought them to my Grandma for show and tell. I wanted her to know that I was putting her Viking sewing machine to good use and learning a new skill that many generations of women in my family have spent years mastering.
While congratulating me on my accomplishment, she quickly pointed out that the pattern on my second neck warmer did not align at the seam - something I had not yet noticed. A day later, I was still boasting and patting myself on the back for sewing together two rectangular pieces of fabric.
This week, I crafted my third neck warmer after a quick stop by Odds & Endz. My best one yet. However, I let my ego and beginner sewing confidence get the best of me, and I began sewing before refreshing my memory on YouTube with the necessary critical steps. After undoing my sewing work, I made the proper corrections and fixed my mistake.
I've been wearing neck warmer #3 every day since. On Saturday, I found myself again, pulling into the Odds & Endz parking lot and sorting through the fabric bins, searching for a catchy pattern and sewing project inspiration.

I have a soft spot in my heart for neck warmers and will continue to hone my zigzag stitch in the coming weeks. If you want a neck warmer with a little character and a lot of love, feel free to reach out. I welcome the practice.
Up next: learning how to sew aprons and tote bags. Stay tuned.